Bagelmania is here courtesy of the Daring Bakers(Freya and Jenny to be exact). This month’s challenge was to make, as the recipe says, Real Honest Purist’s Bagels. Now it has been a few years since I made bagels, and it had been a really long time since I made plain bagels. I like most people buy their bagels. But it is fun to do and if you have never made them before it is definitely something you should add to your list of things to learn to do.
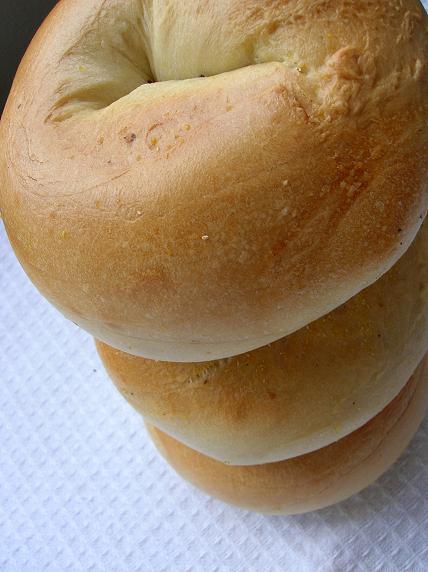
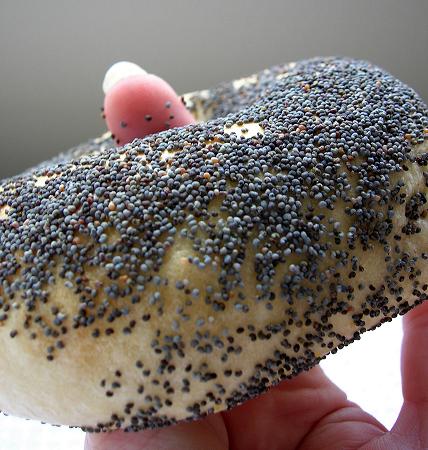
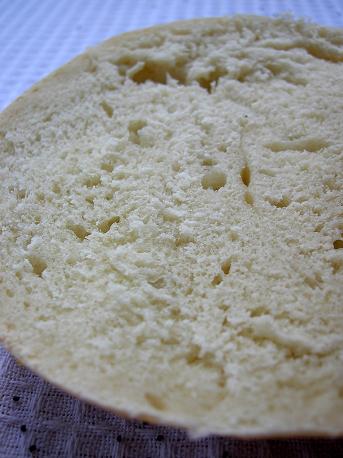
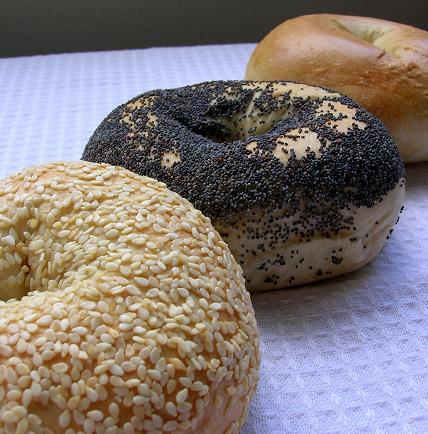
One thing many of the daring bakers learned during this task was that though you think you don’t need anymore flour, you are to use all of the flour! For me, my quirks were that I only had one sink(a rebel no doubt) while the rest just floated. They should sink and then float…gracefully according to the recipe. Well there was nothing graceful about how my one bagel floated to the top. My other problem was that I did this rushed and so I did not really pay attention to the fact that during half proofing they pretty much whole proofed and there were no more holes in my bagels….just a bagel butt crack. I did have one hole(see photo of poppyseed bagel below). But the rest, nothing but bagel butt crack I tell ya! I did deviate on one part. I did egg wash my plain bagels. I just could not stand them not being brown, though they were no where near as brown as you would like them. I of course only took pictures of the halfway decent looking ones too.

Real Honest Purist¢â¬â„¢s Bagels
INGREDIENTS:
6-8 cups bread (high-gluten) flour
4 tablespoons dry baking yeast
6 tablespoons granulated white sugar or light honey (clover honey is good)
2 teaspoons salt
3 cups hot water
a bit of vegetable oil
1 gallon water
3-5 tablespoons malt syrup or sugar
a few handfuls of cornmeal
EQUIPMENT:
large mixing bowl
wire whisk
measuring cups and spoons
wooden mixing spoon
butter knife or baker’s dough blade
clean, dry surface for kneading
3 clean, dry kitchen towels
warm, but not hot, place to set dough to rise
large stockpot
slotted spoon
2 baking sheets
HOW YOU DO IT:
First, pour three cups of hot water into the mixing bowl. The water should be hot, but not so hot that you can’t bear to put your fingers in it for several seconds at a time. Add the sugar or honey and stir it with your fingers (a good way to make sure the water is not too hot) or with a wire whisk to dissolve. Sprinkle the yeast over the surface of the water, and stir to dissolve.
Wait about ten minutes for the yeast to begin to revive and grow. This is known as “proofing” the yeast, which simply means that you’re checking to make sure your yeast is viable. Skipping this step could result in your trying to make bagels with dead yeast, which results in bagels so hard and potentially dangerous that they are banned under the terms of the Geneva Convention. You will know that the yeast is okay if it begins to foam and exude a sweetish, slightly beery smell.
At this point, add about three cups of flour as well as the 2 tsp of salt to the water and yeast and begin mixing it in. Some people subscribe to the theory that it is easier to tell what’s going on with the dough if you use your hands rather than a spoon to mix things into the dough, but others prefer the less physically direct spoon. As an advocate of the bare-knuckles school of baking, I proffer the following advice: clip your fingernails, take off your rings and wristwatch, and wash your hands thoroughly to the elbows, like a surgeon. Then you may dive into the dough with impunity. I generally use my right hand to mix, so that my left is free to add flour and other ingredients and to hold the bowl steady. Left-handed people might find that the reverse works better for them. Having one hand clean and free to perform various tasks works best.
When you have incorporated the first three cups of lour, the dough should begin to become thick-ish. Add more flour, a half-cup or so at a time, and mix each addition thoroughly before adding more flour. As the dough gets thicker, add less and less flour at a time. Soon you will begin to knead it by hand (if you’re using your hands to mix the dough in the first place, this segue is hardly noticeable). If you have a big enough and shallow enough bowl, use it as the kneading bowl, otherwise use that clean, dry, flat countertop or tabletop mentioned in the “Equipment” list above. Sprinkle your work surface or bowl with a handful of flour, put your dough on top, and start kneading. Add bits of flour if necessary to keep the dough from sticking (to your hands, to the bowl or countertop, etc….). Soon you should have a nice stiff dough. It will be quite elastic, but heavy and stiffer than a normal bread dough. Do not make it too dry, however… it should still give easily and stretch easily without tearing.
Place the dough in a lightly oiled bowl, and cover with one of your clean kitchen towels, dampened somewhat by getting it wet and then wringing it out thoroughly. If you swish the dough around in the bowl, you can get the whole ball of dough covered with a very thin film of oil, which will keep it from drying out.
Place the bowl with the dough in it in a dry, warm (but not hot) place, free from drafts. Allow it to rise until doubled in volume. Some people try to accelerate rising by putting the dough in the oven, where the pilot lights keep the temperature slightly elevated. If it’s cold in your kitchen, you can try this, but remember to leave the oven door open or it may become too hot and begin to kill the yeast and cook the dough. An ambient temperature of about 80 degrees Farenheit (25 centigrades) is ideal for rising dough.
While the dough is rising, fill your stockpot with about a gallon of water and set it on the fire to boil. When it reaches a boil, add the malt syrup or sugar and reduce the heat so that the water just barely simmers; the surface of the water should hardly move.
Once the dough has risen, turn it onto your work surface, punch it down, and divide immediately into as many hunks as you want to make bagels. For this recipe, you will probably end up with about 15 bagels, so you will divide the dough into 15 roughly even-sized hunks. Begin forming the bagels. There are two schools of thought on this. One method of bagel formation involves shaping the dough into a rough sphere, then poking a hole through the middle with a finger and then pulling at the dough around the hole to make the bagel. This is the hole-centric method. The dough-centric method involves making a long cylindrical “snake” of dough and wrapping it around your hand into a loop and mashing the ends together. Whatever you like to do is fine. DO NOT, however, give in to the temptation of using a doughnut or cookie cutter to shape your bagels. This will pusht them out of the realm of Jewish Bagel Authenticity and give them a distinctly Protestant air. The bagels will not be perfectly shaped. They will not be symmetrical. This is normal. This is okay. Enjoy the diversity. Just like snowflakes, no two genuine bagels are exactly alike.
Begin to preheat the oven to 400 degrees Farenheit.
Once the bagels are formed, let them sit for about 10 minutes. They will begin to rise slightly. Ideally, they will rise by about one-fourth volume… a technique called “half-proofing” the dough. At the end of the half-proofing, drop the bagels into the simmering water one by one. You don’t want to crowd them, and so there should only be two or three bagels simmering at any given time. The bagels should sink first, then gracefully float to the top of the simmering water. If they float, it’s not a big deal, but it does mean that you’ll have a somewhat more bready (and less bagely) texture. Let the bagel simmer for about three minutes, then turn them over with a skimmer or a slotted spoon. Simmer another three minutes, and then lift the bagels out of the water and set them on a clean kitchen towel that has been spread on the countertop for this purpose. The bagels should be pretty and shiny, thanks to the malt syrup or sugar in the boiling water.
Once all the bagels have been boiled, prepare your baking sheets by sprinkling them with cornmeal. Then arrange the bagels on the prepared baking sheets and put them in the oven. Let them bake for about 25 mintues, then remove from the oven, turn them over and put them back in the oven to finish baking for about ten minutes more. This will help to prevent flat-bottomed bagels.
Remove from the oven and cool on wire racks, or on a dry clean towels if you have no racks. Do not attempt to cut them until they are cool… hot bagels slice abominably and you’ll end up with a wadded mass of bagel pulp. Don’t do it.
TO CUSTOMIZE BAGELS: After boiling but before baking, brush the bagels with a wash made of 1 egg white and 3 tablespoons ice water beaten together. Sprinkle with the topping of your choice: poppy, sesame, or caraway seeds, toasted onion or raw garlic bits, salt or whatever you like. Just remember that bagels are essentially a savory baked good, not a sweet one, and so things like fruit and sweet spices are really rather out of place.
Adapted from http://www.jewish-food.org/recipes/brea0007.htm

To see more Bagelmania, check out what the other Daring Bakers did with theirs(see blogroll that says…what else, Daring Bakers).

The TriniGourmet says
WOW.. i haven’t had good bagels in years. Will give this recipe a try 🙂
sher says
Wow! Yours are gorgeous! And you have a really nice looking fingernail too. 🙂 I chew mine off, so I’m very jealous!
Mary says
I like that your bagels have no hole. That way the filling can’t escape. 🙂
kellypea says
I love how your toppings are really covering your bagels. And they’re so fat and perfect!
KJ says
I think they look great. They are so nice and smooth and even. Mine were all lumpy. And you had a sinker. That’s one more than me!! LOL.
Kelly-Jane says
Well I think they look perfect! Your first pic is especially good.
Meeta says
As i expected – they look incredible. I like the fact that they look so plump!!
Lydia says
Well, hole or no hole, these look amazing!
Laura says
Beautiful fat shiny bagels yum!
ilva says
Oh, you too, they look just great! Everyone makes such beautiful bagels and mine look like well a bit different. But I suppose I have to practice!
Anne says
Very pretty bagels…so fat and shiny. Thay are just perfect 🙂
baking soda says
They look awesome! Pretty pictures as well…sigh. Brava!
Rebecca Bourke says
Wow, they look really good. I made bagels just the other day, though I used a bread machine to help >_
Amanda says
I’m still laughing at your term ‘bagel butt crack’. That last pic is superb!
veron says
Oh that “bagel butt crack” is priceless! Your bagels look adorable to me….
Janet says
Those bagels are sublime!!! Awesome job! Thanks for the inspiration.
Cheryl says
Really nice, round shapely bagels. And very cute bagel butt crack.
Tartelette says
I am telling you, you coined the bagel butt crack phrase! They look awesome, plump and golden..yum!
breadchick says
Bagel butt crack or not, I’m coming over with the cream cheese, the chives and the fish! Excellent bagels!!
Amy says
Does anyone know if I can substitute instant or active dry yeast for the dry baking yeast? I totally want to make these!
Patricia Scarpin says
Peabody, they’re wonderful – the butt crack made me laugh aloud here. 🙂
Lisa says
Gorgeous bagels, Gracie! And how do you keep such nice nails while baking and playing hockey so often? hehe Yeah yeah, I’m jealous.. pay no attention. Just call me stubby and uneven nails. 😀
Anyhoo back to bagels, yes? I love the shape of yours and quite frankly, who needs the hole? All of the good stuff escapes through the hole!
I would prefer my bagels to have buttcracks instead. har!
xoxox
Mandy says
Bagel is something I always wanted to try! Yours look awesome.
sandi @ the whistlestop cafe says
Hands Down~ You Win!
You can cook and take awesome photos. And make it looke easy enough that anyone could try.
Peabody you take the cake.
Lynn says
Your bagels are beautiful! I love my bagels without big holes; the melting butter doesn’t drip out that way. Perhaps they are plumber’s bagels – with just the crack showing?
Lorrie says
These look fantastic. I live in the bagel capital of the world so I know what I’m talking about. Try an everything bagel..onion..garlic..poppy..sesame seed..rye..kosher salt. I love the butt crack 🙂
Rose says
Looking good
gilly says
Hey Pea! Great job – I love how chubby they are – bagel crack and all! Good call on the egg wash for the plain ones… I wish I’d done that, as I like my browned too!
Ivonne says
My favourite new term is “bagel butt crack.”
Haaaaaaaaaaaa!
Your bagels look tremendous, Peabody!
Jenny says
I’m with Mary – no whole means no way for the filling to escape! Your bagels look lovely!
peabody says
Sher and Lis- I used to have stubby nails that I would chew to the quick. My mom bet me money that I couldn’t go a year without touching them(that was 1999), haven’t touched them since. Apparently butter and sugar make your nails strong 🙂
Mary- no escaping is good
Kellypea- yeah I went topping crazy. I roll them and then re-egg wash and roll them again. The sesame seeds stayed much better than the poppy seeds.
KJ-I’m still trying to figure out why only one sank
Kelly Jane- thanks for the compliment
Meeta- plump bagels, just like me 🙂
Ilva- yes practice! I have made bagels a whole bunch. I was actually on a year long kick where I made them every weekend…so I am no stranger to bagels. If it makes you feel any better…I made horrible looking pies!
Sandi- well there is nothing to win and I am quite sure some of our more seasoned DB’s came up with something just as lovely as mine
Lynn- lol- I thought about calling them plumbers bagels… I even thought about a photo with half the bagel covered in fabric with just the butt crack showing
Lorrie- I do love me an everything bagel…especially when I make a sandwich out of it
Gilly- yes, egg wash was the way to go
Tanna says
So, I think it’s a done deal “bagel butt crack” is the new in bagel! No hole, no escaping goodness. Great bagels Peabody!
Jerry says
You started a bagel modeling agency by selecting the best!
Elle says
Who needs holes in the bagel when they look this good? I’ll take the one with the butt crack and sesame seeds, please. Can’t wait to see what evil recipe you come up with for July!
Jenn - The Leftover Queen says
Those look wonderful Peabody! Smooth and crunchy with soft insides! Nice Job!
heather says
Just beautiful. I really didn’t even think of using that many of the seeds on my bagels, I don’t know why either!
Jann says
They came out perfect~Maybe you can open a store selling them~
Marce says
I love their little buttcracks, Peabody hahaa I think this definition has staying power, kinda like the refund muffins.
Sara says
Bagel Butt Crack – I love it!
brilynn says
Your bagels are so smooth! Mine were definitely more on the gnarled side.
Amy says
Lol bagel butt crack. 😛 I agree with Mary, I like that there’s no hole so then the bagelwich filling doesn’t fall out! 😀 Your bagels are so pretty and evenly covered with topping!
Christine says
Your bagels look like the ones purchased at a high end bagel shop! I’m so impressed! 🙂
Glenna says
Peabody–your crusts are gorgeous! The color and texture are perfect. I don’t think I care about the hole or not :-). Seriously, I’ve bought lots of bagels before that don’t have a full hole. All I noticed when I first saw yours was the gorgeous color and smoothness.
R Khooks says
I tried making bagels once (I used a Nigella Lawson recipe). It turned out to be nightmare. I ended up with wrinkled shrunken bagels which were chewy like an old piece of leather. I’ll have to give your recipe a go.
Kirsten says
Wayyyy impressive, and delicious looking! Being from Chicago, I MISS good bagels. There are a few good places locally, but not like Chicago!
Colleen says
Bagel Butt Cracks RULE!!!!!!!! They’re gorgeous 🙂
Chris says
Wow…these are so inspirational! I must complete a do-over. I love sesame seed bagels!